1. Connection
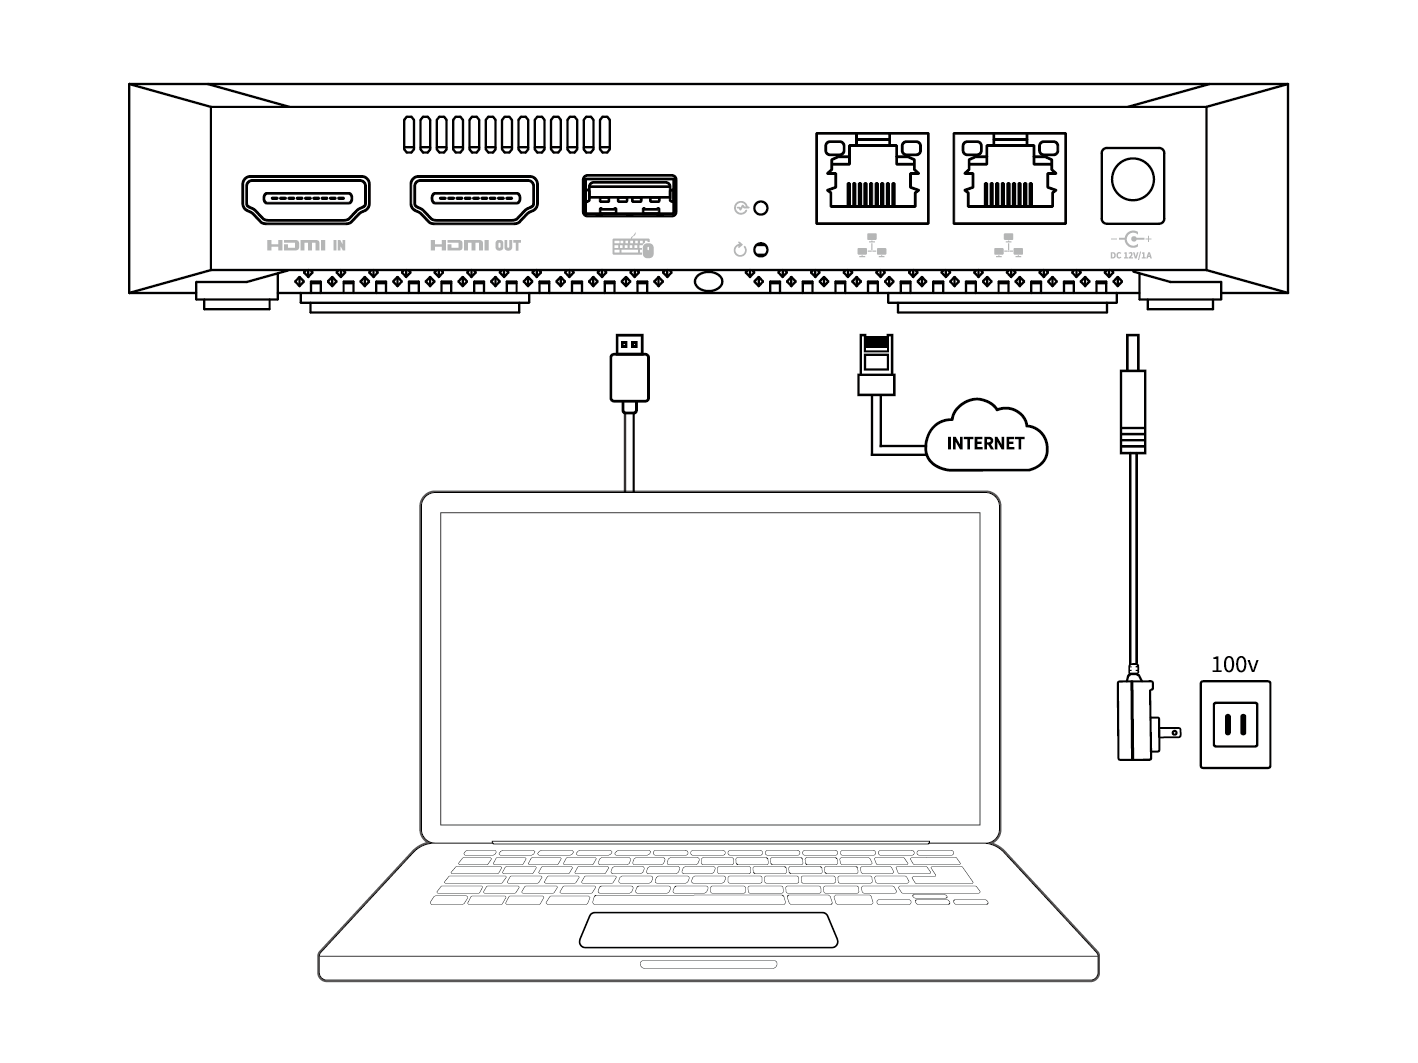
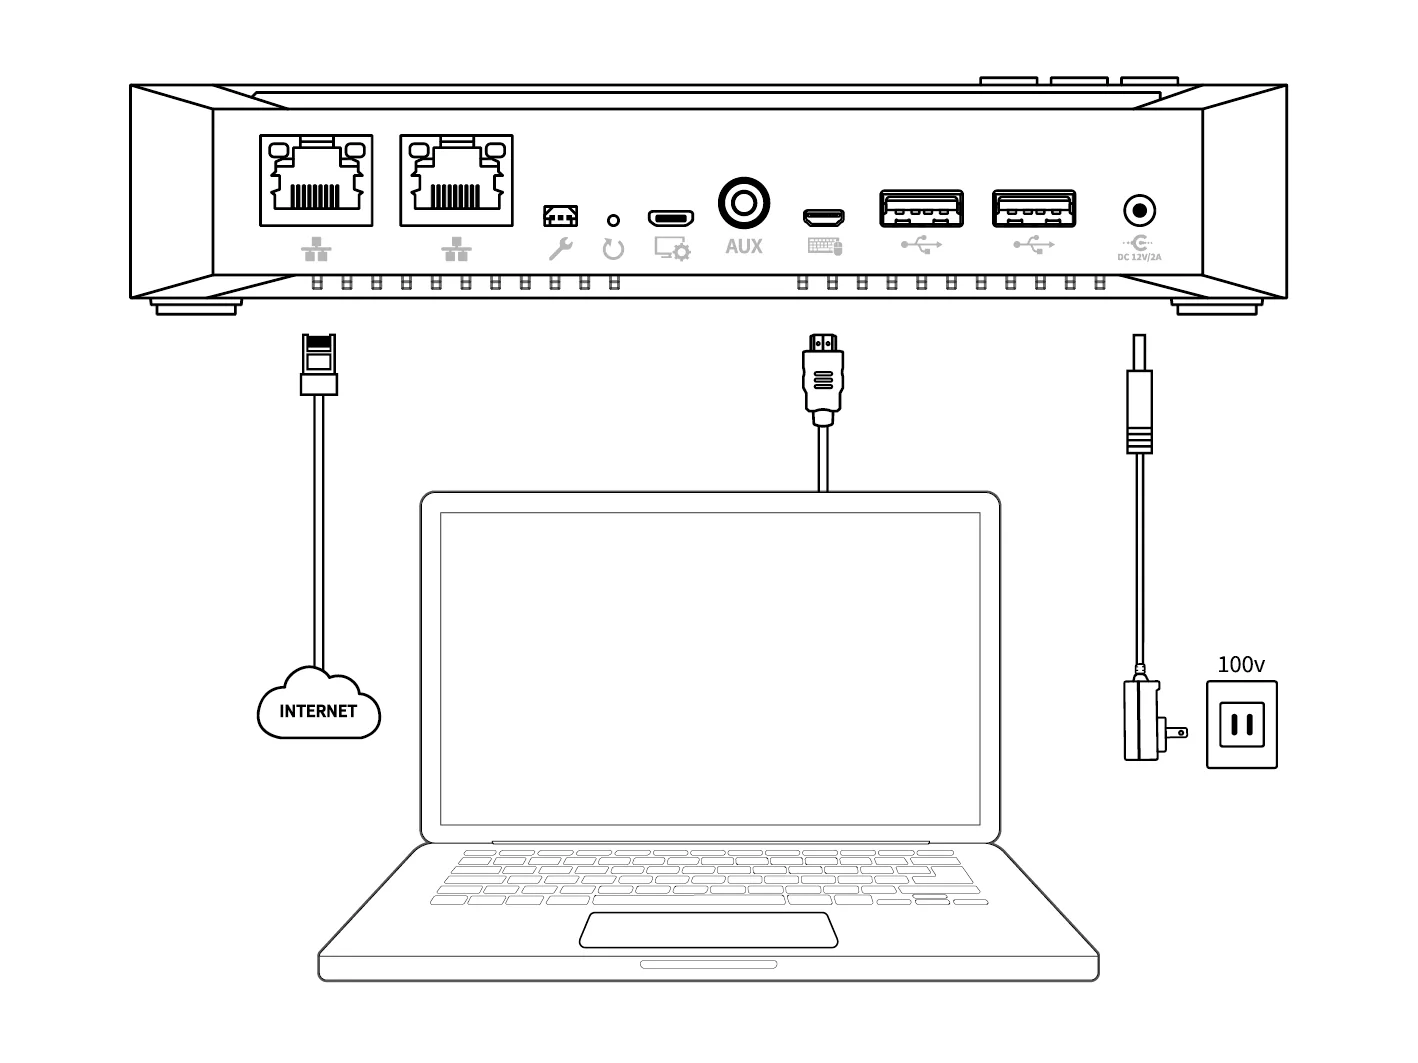
1. Connect the HDMI for video and sound communication.
2. Connect the Internet to the LAN port.
3. Connect the USB for mouse/keyboard communication.
4. Connect the power adapter to an AC power source, and then plug it to the power jack.
5. Output the RV BOX screen to a display (if required).
2. Network settings
- Launch the web browser, access the initial IP address as http://10.10.10.10, and log in.
(Default, ID:admin / Password:111111) - Select [DHCP] from Ethernet or Wi-Fi in network settings and click [Continue] to go to box.rview.com.
3. Device’s IP
- Enter the MAC address you checked on the Remoteview BOX setting site (10.10.10.10).
4. Connecting to the Network Settings
- Go to the IP settings page and log in.
5. Device registration
- Enter the device display name to be shown on the remote PC management page.
- Enter the access ID/PW to be used to access the device.
* Keep this information accessible as it is needed to connect to the remote device.
6. User account registration
- Enter the account information for www.rview.com to access the RV BOX device from.
* Company ID: Enter the Company ID entered during Enterprise license registration.
* User ID: Enter the manager ID (or manager ID, user ID).
* Password: Enter the password.
7. Setup completed
- RV BOX setup is complete.
- Access the service website (rview.com) to remotely access the equipment.
8. Log in to service website
- The RemoteView service website is a place for all users to access and control all the devices.
- The administrator can check/change all options related to the RemoteView service.
9. Remote Access
① Select an available remote PC and double-click the PC icon or
right-click and select [Video Mode Control, Web Viewer] from the menu.
② Enter the Access ID/PW (agent login account).
③ RemoteView viewer is launched on the user’s PC, and the remote PC’s screen will appear on the viewer.