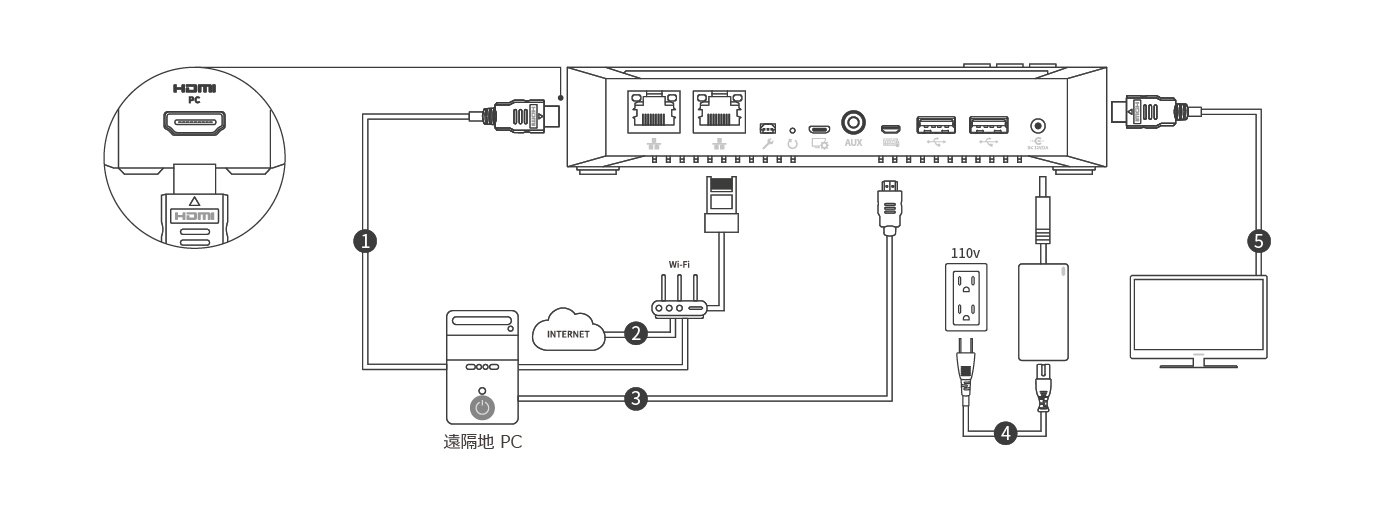
Guide

Help Center

Connecting to the RemoteView Box

DHCP

1. Connection

1. Connect the HDMI for video and sound communication. 
2. Connect the Internet to the LAN port.
3. Connect the USB for mouse/keyboard communication.
4. Connect the power adapter to an AC power source, and then plug it to the power jack.  
5. Output the RV BOX screen to a display (if required).

2. Network settings

  • Launch the web browser, access the initial IP address as http://10.10.10.10, and log in.
    (Default, ID:admin / Password:111111)
  • Select [DHCP] from Ethernet or Wi-Fi in network settings and click [Continue] to go to box.rview.com.

3. Device’s IP

  • Enter the MAC address you checked on the Remoteview BOX setting site (10.10.10.10).
MAC
Search Result

2C-D2-6B-2D-59-8C

connect

4. Connecting to the Network Settings

  • Go to the IP settings page and log in.

5. Device registration

  • Enter the device display name to be shown on the remote PC management page.
  • Enter the access ID/PW to be used to access the device.
    * Keep this information accessible as it is needed to connect to the remote device.

6. User account registration

  • Enter the account information for www.rview.com to access the RV BOX device from.
    * Company ID: Enter the Company ID entered during Enterprise license registration.
    * User ID: Enter the manager ID (or manager ID, user ID).
    * Password: Enter the password.

7. Setup completed

  • RV BOX setup is complete.
  • Access the service website (rview.com) to remotely access the equipment.

8. Log in to service website

  • The RemoteView service website is a place for all users to access and control all the devices.
  • The administrator can check/change all options related to the RemoteView service.

9. Remote Access


① Select an available remote PC and double-click the PC icon or
      right-click and select [Video Mode Control, Web Viewer] from the menu.
② Enter the Access ID/PW (agent login account).
③ RemoteView viewer is launched on the user’s PC, and the remote PC’s screen will appear on the viewer.